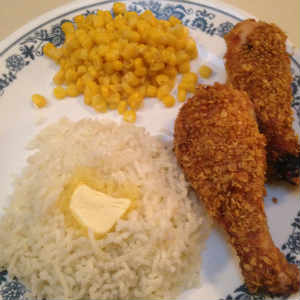
Crispy Corn Flake Baked Chicken
-One of my kids favorite meals is this simple inexpensive Baked Chicken, beware though, you will want to eat the skin from every piece in the dish. Can also be done with skinless chicken too. My mom always made her chicken this way and now that chicken is one of the least expensive meats on a per pound basis, I find I am cooking it more often. If your looking for a new way to prepare chicken, try this recipe that makes tender, juicy, baked chicken for dinner.
 It’s really quite simple. You simply use miracle whip salad dressing to coat your pieces of chicken before rolling in corn flake crumbs that have been seasoned with your favorite chicken seasoning. I personally use Lawry’s seasoning salt and basic chicken seasoning. After placing the chicken in the baking dish, I sprinkle again with some of the chicken seasoning.
Here are the steps I taken when I make my baked chicken.
First I make sure the rack is in the center position. Then I turn my oven on and set the temperature to 350 degrees F. Next I get my chicken out of the refrigerator and thoroughly wash each piece with cold water and remove any fatty pieces, bad spots on skin and pin feathers if any. I love to eat the skin on this chicken, because it turns so crispy and nearly transparent, so I always wash and inspect it well. I place it on a plate after I wash each piece and leave it to dry off a bit while I prepare my corn flakes. You can find information about safely handling and preparing chicken here.
I have a nice little food processor that chops up my corn flakes very nicely. You can also buy corn flake crumbs that come in a box at you local grocery store. Usually found in the stuffing area. It is much more economical to make your own and you can make it as fine or coarse as you like. I like crumb size, not quite powder and not quite a flake either. After I have processed my corn flakes into crumbs I add a couple teaspoons of seasoning salt and a tablespoon of chicken seasoning and mix it lightly into the crumbs in a shallow bowl. Pasta bowls work well or you can use a pie pan. I place a heaping tablespoon of miracle whip in a small dish or on a small plate. I wash my hands and get to work. I take a small amount of miracle whip and begin rubbing it all over the chicken piece, making each piece completely covered with a thin layer, just enough to make the corn flake crumbs stick well to each piece. It should not be to heavy and should not be clumping or showing visible white blobs of miracle whip. Basically your washing each piece with the miracle whip, similar to that of an egg wash. If your chicken is too wet, the miracle whip will not stick well to your chicken pieces, so you may need to blot off your pieces with a paper towel before applying the miracle whip
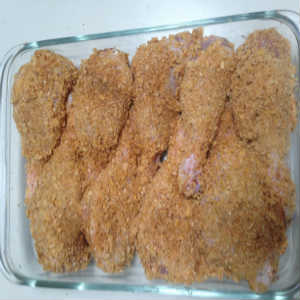 After each piece is completely covered and placed back on the plate, I roll and press each piece into the dish of crumbs and place it with the meatiest side up in a shallow oblong baking dish. I also place the bigger pieces near the outside of my baking dish. Legs I place with the small knuckle end pointing inward. After all pieces are completely coated and in the baking dish I sprinkle with a little more seasoning salt and chicken seasoning. Place it in the oven, uncovered for an hour. If the coating begins to get overcooked or show signs of browning too much, you can tent it lightly with foil near the end of the cook time if your pieces are rather large and require a longer cooking time. Chicken should easily fall from the bone when done. Smaller boneless pieces will take less time and juices should be clear when you pierce with a fork when done.
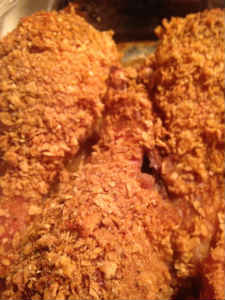
After I get the chicken in the oven I will begin pealing my potatoes, preparing a squash to add to the oven or chop up a zucchini to get ready to fry up. Usually it’s potatoes though. This is not the best recipe if you want to make gravy from the drippings. The crumbs tend to soak it all up and you basically have just soggy corn fakes in the bottom of your baking dish. We like to have either baked or rice potatoes with this. Another favorite is noodles with seasoned butter (usually a bit of bullion works good) or sauce.
The cost for this entire meal including potatoes and corn is about $1.20 per person
Rice Potatoes
My kids love rice potatoes. If you do not have a potato ricer, you should consider getting one, especially if you have kids. I have even used it to rice a butter stick that was chilled and I needed softer butter or when I make honey butter for rolls, biscuits and toast. Make sure to get one that is quality made. Ones that have only holes in the bottom are best. When ricing rather soaked or slightly over cooked potatoes you can press it over the sink to drain off moisture and then hold over your plate or bowl once potatoes begin to squeeze out. Do not over fill the potato ricer, usually 3/4 full is a good amount for easy pressing. Great for squash too.
Here is a good small Food Processor and Potato Ricer to consider if you wish to purchase either one for your kitchen. I love my small processor for quick small jobs, especially chopping onions or making cracker and corn flake crumbs.