Fixing Leaking Tub Drain
-As I mentioned in an earlier post, I had discovered that my bathtub seemed to be leaking. I live in a manufactured home, so most repairs can easily be done to water lines and drains from under the house. I removed a long section of the skirting so I could gain easy access to the area that the water was dripping from. Fortunately the tub is located on an outside wall, so I did not have to crawl way under the house to gain access to the area in need of repair. I could feel that the vapor barrier was quite heavy with water soaked insulation and water was only leaking from areas where the vapor barrier had been breached.
I located the bay the the tub drain was located in by measuring inside from the closest end of the house to the drain. then 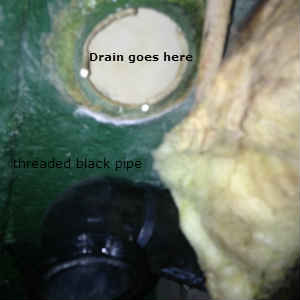 measured on the outside to see where the drain would be. Leaving plenty of room to tape the new vapor barrier in place to the existing vapor barrier, I used a razor knife to slice the existing vapor barrier to expose the bay that would need to have the soaked insulation replaced and gain access to the drain. I also noticed that the water had run along a dip in the vapor barrier along the outside edge and felt rather full of water, so I place a slice in the barrier at the lowest point to allow the water to drain out. Again, leaving a nice wide strip to apply tape to, I sliced the vapor barrier to gain access to the damaged insulation so it could be replaced. I can easily see that when I’m done this area of the home will be much better insulated and should have a less likely chance of pipes freezing this winter.
I could not remove the ring that held the trap that I had to remove, so I used a sharp chisel and hammer to cut away the ring. This worked quite nicely. I can now take all the pieces I removed to insure that I can get the right pieces needed to make the repair and replace the tub drain. Hoping just one trip to home depot will be all I need to get the job done. That ring was nice to have to insure I had the right piece needed. The trap I bought had the piece it screwed into, so I was able to make sure the threads were the same as well as the size. I just put the piece that I didn’t need to replace in my parts box, in case it might come in handy some time in the future.
Products Purchased and Steps Taken
I went to our local Home Depot and I picked up a drain assembly, a roll of R-13 faced insulation, PVC primer and glue, my trap, a 3 inch piece of PVC (they cut it off a left over piece someone didn’t need, so it was free) and a fitting to secure to drain assembly. The grand total was 43.78 to get what I needed. I already had plumber’s putty and wide tape.
First I did a dry fit of all the parts to insure everything would go together as it should. Went together pretty good, except for the drain assembly to the fitting, it would not snug up to the bottom of the tub. I still had my left over parts, so used a ring and a rubber washer to give me the filler I needed. I secured the drain first, making sure to have a nice sized bead of plumber’s putty between the drain and the tub. I placed the grips of a large pair of pliers into the drain so my son could hold it tight and keep it from spinning as I secured it from under the house. I took my three inch piece and primed and glued it to the trap section. I then primed and glued the other end of the three inch piece as well as the fitting end and quickly glued it into place, insuring that it was in the correct position to screw the attached ring on to the black pipe that I disconnected the old pipes from. I tightened ring and tested my work. Hooray, not a dribble.
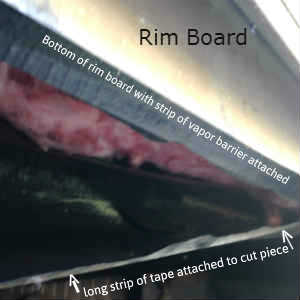 I discovered I had no insulation for the rim of the house, so I sliced the vapor barrier down the entire length of that part of the house. This exposed the rim board and made it easy to cut a bunch of 5.5 inch by 15 inch pieces of insulation and removed the paper face. I placed each of these pieces in each bay to insulate along the rim board and butted the existing insulation up to it. Because manufactured homes usually have an air space between the floor and insulation, cold air has been gaining easy access to this space and needed to be insulated. I then placed a long piece of tape on the cut edge of the vapor barrier, so I could easily press it firmly to the vapor barrier. Next I started at the beginning and pressed it firmly to the small strip I left that was covering the bottom of the rim board, giving me a firm backing to press the tape firmly to the vapor barrier. I would very much like to do the rest of the house as soon as I’m able and the weather is still pleasant. I cut away all the old nasty insulation and replace it. I ran it down each bay rather than across as it was originally, placing a layer without the paper backing first and one with the paper face next, so I could staple it to the joists.
Once all the insulation was in place it was time to repair and replace an area of the vapor barrier. I had a nice sized piece of blue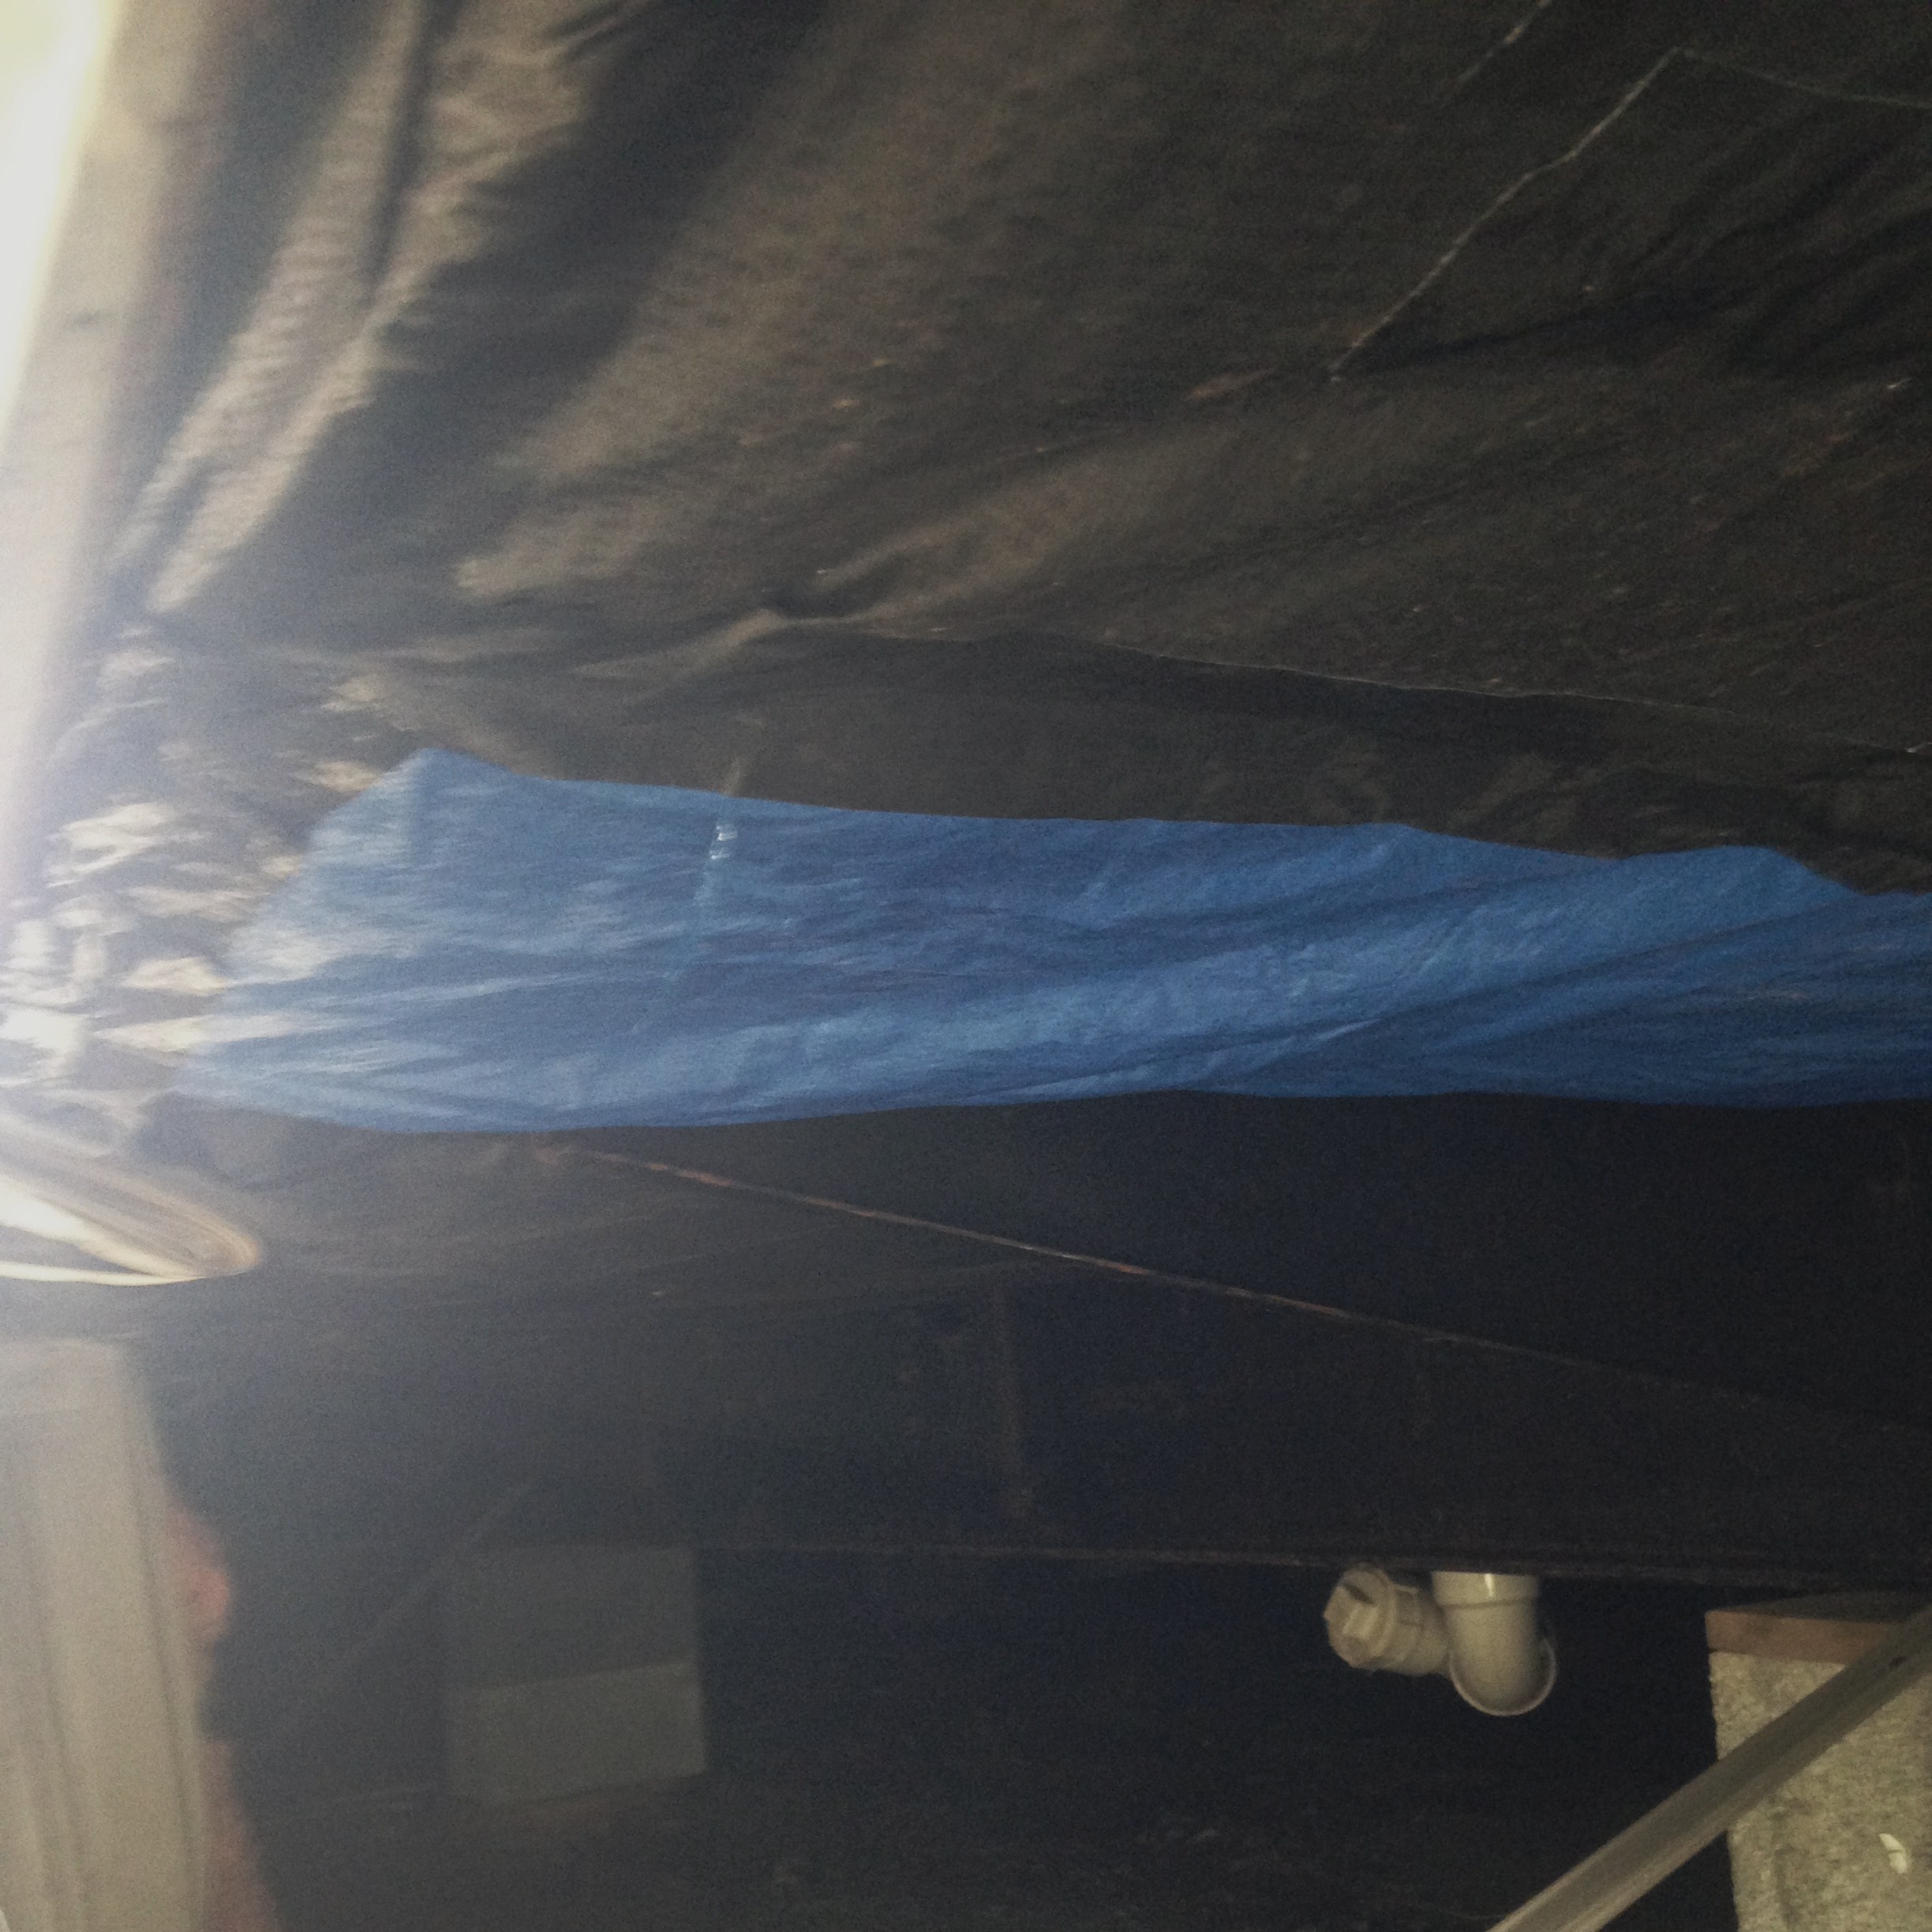 tarp left over from when I had to repair a leaking water pipe under the kitchen that required a large vapor barrier repair. I made it twice the size I needed and secured tape along three of the edges, while I had a firm surface to press it securely to the tarp. Starting at the small back edge I squared it up and pressed it in place in a few places to make sure adjustments were not needed. When it was where I wanted it I pressed it into place. I needed to trim a small strip off the edge I didn’t tape yet that ran along the bottom of the rim board. Once it was trimmed I taped that edge off as well. Then I taped the vapor barrier I cut to expose a large area of damaged insulation. I always secured the tape to the loose pieces of vapor barrier first so I could press it down firmly with my fingers and because I left just enough to tape the cut piece to the piece that was close to the rim and supports. I had a nice firm surface to press that tape firmly into place.
I cleaned up my mess under the house, made sure I had all my tools and replaced all the skirting that I had stacked in order as I removed it. I was finished, a rather rewarding, satisfying job well done. Kids can quit using my shower and I have less worries of pipes freezing in that bathroom this winter. Saved me a lot of money I simply didn’t have any money to spare to spend on a plumber. It was a good day.
Tools I used;
razor knife
framing square- to make straight cuts in the insulation
carpenter’s stapler
measuring tape
two pair of large pliers- one was used to hold drain firmly in place by inserting the handles in the drain.
small chisel and hammer to cut away stuck plastic ring
large roll of 3 inch tape
If you’re fortunate enough to have one of these types of drains, it should be an easy fix. To remove the plugs from foot lock or roller ball tub drains, simply rotate the plug counterclockwise until it’s free of the drain.